What Is Crustless Chicken Pot Pie, and Why It Works
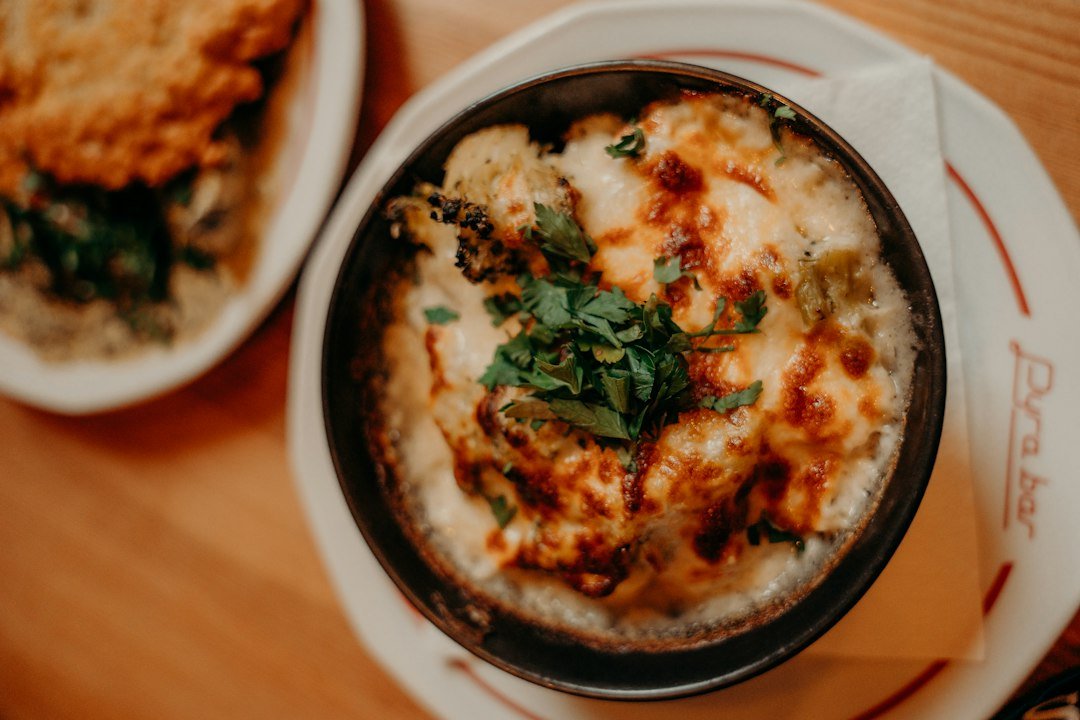
Crustless chicken pot pie is a creamy chicken-and-vegetable filling cooked without a pastry shell, delivering all the comfort-food flavour of traditional pot pie with significantly fewer carbohydrates and calories. That's the simplest way to put it, and it's also what makes this dish worth knowing.
Without the pastry, you're already cutting 30–40% of the carbohydrates compared to a standard pot pie. The calorie drop is equally notable: a traditional slice lands somewhere between 400 and 500 calories per serving, while a crustless version typically comes in at 250–320 calories, making it a genuinely practical choice for anyone watching their intake without wanting to give up the foods they love.
The filling itself uses the same roux-based cream sauce you'd find in a classic recipe: butter, flour (or a low-carb substitute), chicken broth, and whole milk combine into a thick, velvety sauce that holds the dish together without any pastry required. As The Dinner Bite's crustless chicken pot pie recipe and The Dizzy Cook's version both demonstrate, you don't need a crust to achieve that deeply satisfying, savoury result.
One practical advantage that often gets overlooked: a crustless pot pie cooks faster. Without the need to blind-bake or wait for pastry to set, total oven time drops to around 25–35 minutes. The dish is also naturally adaptable across dairy-free, gluten-free, Instant Pot, and slow cooker formats, which we'll cover in full below. Browse our food category for more recipe guides in this vein.
How to Make Crustless Chicken Pot Pie: Ingredients, Technique, and Expert Tips
Start With the Right Chicken and Vegetables
Before anything goes into the pan, prep matters more than most recipes acknowledge. Chicken breast should be diced into ¾-inch cubes and patted completely dry with paper towels. That step isn't optional: dry surface area is what drives the Maillard reaction when the chicken hits a hot pan, and those caramelised edges are what give the filling its depth of flavour. Aim for uniform cuts across all your vegetables too. Inconsistent sizing means some pieces turn mushy while others stay undercooked.
Sharp knives make this process considerably faster and safer. If your knife is dragging through an onion rather than slicing cleanly, check out our guide on how to sharpen a kitchen knife or our roundup of the best knife sharpening tools for home chefs before your next session.
Core ingredients for 4 servings:
- 1.5 lbs boneless, skinless chicken breast, cubed
- 1 cup diced carrots
- 1 cup frozen peas
- 1 cup diced celery
- 1/2 cup diced onion
- 3 tablespoons unsalted butter
- 3 tablespoons all-purpose flour
- 1.5 cups low-sodium chicken broth
- 3/4 cup whole milk
- 1 teaspoon fresh thyme
- 1/2 teaspoon smoked paprika
- Salt and black pepper to taste
Building the Roux: The Single Most Important Step
The roux is where most home cooks lose the dish. Equal parts butter and flour need to cook together in the pan for a full 90 seconds before any liquid is added. Less time than that and you'll taste raw flour in the finished sauce, no matter how much seasoning you add on top.
Once the roux looks slightly golden and smells nutty, add the cold chicken broth gradually, pouring in a steady stream while whisking constantly. Slow addition keeps the sauce emulsified and smooth. Continue whisking over medium heat until the mixture reaches at least 200°F (93°C), which is the threshold at which the starch fully gelatinises and the sauce thickens properly. Adding the thyme and smoked paprika at this roux stage, rather than at the end, gives both spices time to bloom and integrates them into the flavour base in a way that most basic recipes don't prioritise.
Fold in your seared chicken and cooked vegetables once the sauce has thickened, then pour everything into your baking vessel.
Choosing the Right Cookware
A 10–12 inch cast iron skillet or an enamelled Dutch oven is the preferred vessel for crustless pot pie. Both retain heat evenly across the base and sides, which prevents the hot spots that cause cream sauces to scorch at the edges while the centre stays underdone. Cast iron transitions seamlessly from stovetop to oven, meaning you can build the whole filling in a single pan and bake it directly without dirtying a second dish.
Our cookware category covers a wide range of options if you're evaluating what to buy, and our best cookware for induction cooktops guide is worth reading if you're cooking on an induction surface. If you already own cast iron, our how to clean cast iron guide will keep it performing well for years.
Bake at 375°F (190°C) for 25–35 minutes until the surface is bubbling and the filling has set. If you're using a convection oven setting, you can reduce bake time by approximately 25% because the circulating air accelerates heat transfer and produces a slightly caramelised surface on the exposed filling. Our microwave vs. convection oven baking guide explains exactly when convection gives you a meaningful advantage.
Low-Carb and Dietary Variations
The standard recipe clocks in at roughly 12g total carbohydrates per serving. To bring that down further, replace the all-purpose flour with 1 tablespoon of arrowroot starch or 2 teaspoons of xanthan gum. Either thickener produces a sauce with near-identical consistency and drops net carbs to roughly 6–8g per serving. Swapping starchy vegetables like peas and carrots for lower-carb options, such as green beans, mushrooms, or cauliflower, reduces the count further still.
A spaghetti squash variation is worth knowing about for low-carb eaters who want more substance in the filling. This approach replaces the starchy base vegetables entirely and adds a slightly sweet, textured element that works surprisingly well with the cream sauce.
For a dairy-free version, refined coconut oil replaces butter in the roux at a 1:1 swap, and full-fat oat milk or unsweetened cashew cream replaces whole milk at the same ratio without sacrificing sauce richness.
Some egg-based binding techniques can also help firm up the filling if you prefer a more set texture. Our guide on the healthiest way to prepare eggs covers egg handling fundamentals worth knowing before you experiment.
Instant Pot and Slow Cooker Methods
The Instant Pot approach, as demonstrated in this crustless and gluten-free Instant Pot version on Allrecipes, produces a fully cooked filling in under 30 minutes of active time. Pressure-cook the chicken with broth for 8 minutes, release pressure, then build and thicken the sauce on the sauté setting. The result is naturally gluten-free if you use a cornstarch slurry instead of flour.
For the slow cooker method, combine raw diced chicken, vegetables, broth, and seasonings in the morning and cook on LOW for 6–7 hours. Stir in a cornstarch slurry during the final 20 minutes to tighten the filling, adding the milk or cream only at this stage to prevent it from curdling during the long cook. It's a genuinely hands-off version that The Dinner Bite and The Dizzy Cook both acknowledge as a reliable weeknight format.
Rotisserie Chicken Shortcut
Using a pre-cooked rotisserie chicken instead of raw breast meat saves 20–25 minutes of prep and active cooking time. Strip the meat, shred or dice it, and add it directly to the finished sauce. The rotisserie seasoning adds a layer of complexity that raw chicken simply doesn't contribute. It's a shortcut that produces better flavour, not just faster results.
Make-Ahead, Storage, and Reheating
The fully cooked filling keeps in an airtight container in the refrigerator for up to 4 days, or frozen flat in a zip-lock bag for up to 3 months. To freeze properly, cool the filling completely before bagging, and thaw it overnight in the refrigerator rather than at room temperature.
To reheat without drying out the chicken, stir in 2–3 tablespoons of chicken broth per serving and warm the dish covered in a 325°F (163°C) oven for 15–18 minutes. Microwaving at 60% power in 90-second intervals also works well, though the oven method better preserves the sauce texture.
Storing leftovers safely depends on your refrigerator's temperature settings. Our guide to refrigerator temperature settings for food safety explains exactly where to set your fridge to keep cooked dishes in the safe zone.
Nutrition per serving (approximately 1.5 cups): 280–320 calories, 28g protein, 14g fat, 12g total carbohydrates, 2g fibre.
Final Thoughts: Your New Go-To Comfort Meal Without the Crust
Crustless chicken pot pie delivers the same creamy, savoury satisfaction you'd expect from a traditional pot pie, and it does it in less time, with fewer carbohydrates, and at a lower calorie count across nearly every version of the dish. That's not a trade-off, it's an upgrade for most home cooks.
If you take one equipment lesson from this guide, it's that a well-seasoned cast iron skillet or enamelled Dutch oven is the single upgrade most likely to improve both the consistency and flavour of your pot pie. Even heat distribution means no scorched edges, no undercooked centre, and a sauce that stays smooth from stovetop to table.
Here at The Top Kitchen, all our recipe content and technique guides are written by Sophia Garcia, a retired professional chef with real restaurant experience. That background means we go deeper than ingredient lists. We cover the technique behind why things work, and we troubleshoot what goes wrong. If you're looking for more chicken recipes to add to your weeknight rotation, our Shake 'n' Bake Chicken Homemade Recipe is a great next step. For quick, satisfying single-serve cooking, our Protein Powder Mug Cake Recipe is worth bookmarking too.
Crustless Chicken Pot Pie: Frequently Asked Questions
Q: How many calories are in crustless chicken pot pie?
A standard serving of crustless chicken pot pie (approximately 1.5 cups) contains between 280 and 320 calories, along with roughly 28g of protein and 12g of total carbohydrates. Calorie counts vary depending on whether you use whole milk or a dairy alternative and how much butter goes into the roux. Using low-fat milk and reduced-sodium broth can bring each serving closer to 250 calories.
Q: Why is my crustless chicken pot pie filling watery?
Watery filling is almost always caused by one of three issues: an undercooked roux (cook butter and flour together for at least 90 seconds before adding liquid), adding broth too fast (pour it in gradually while whisking to keep the sauce emulsified), or insufficient baking time (the filling needs 25–35 minutes at 375°F to cook off excess moisture). Vegetables with high water content like zucchini or frozen peas should be added in the last 10 minutes to prevent them from releasing liquid into the sauce.
Q: Can you freeze crustless chicken pot pie?
Yes. Allow the cooked filling to cool completely at room temperature for no more than 2 hours, then transfer it to a freezer-safe airtight container or heavy-duty zip-lock bag, removing as much air as possible. It will keep well in the freezer for up to 3 months. Thaw overnight in the refrigerator, never at room temperature, and reheat covered in a 325°F oven with a splash of chicken broth stirred in to restore the sauce consistency. This matches the storage guidance from both The Dinner Bite and The Dizzy Cook.
Q: How do you make crustless chicken pot pie gluten-free?
Crustless chicken pot pie is gluten-free when all-purpose flour is replaced with a certified gluten-free thickener such as cornstarch or a 1:1 gluten-free flour blend. Swap the flour for an equal amount of a certified 1:1 gluten-free blend, or use 1 tablespoon of cornstarch dissolved in 2 tablespoons of cold water as a slurry added to the finished broth instead of building a traditional roux. The Instant Pot version on Allrecipes uses this approach and is both crustless and fully gluten-free. Double-check that your chicken broth is labelled gluten-free, as some brands add wheat-based flavourings.
Q: How long does crustless chicken pot pie last in the fridge?
Leftover crustless chicken pot pie keeps for up to 4 days in the refrigerator and up to 3 months in the freezer when stored in an airtight container. For refrigerator storage, keep your fridge at 35–38°F (1.7–3.3°C) to stay within food safety guidelines. Our refrigerator temperature settings for food safety guide covers the exact settings you need. If your fridge runs warmer than 40°F (4.4°C), consume leftovers within 3 days.
Q: What is the best pan to use for crustless chicken pot pie?
A 10–12 inch cast iron skillet or an enamelled Dutch oven delivers the best results because both retain heat evenly, preventing the hot spots that cause sauces to scorch. Cast iron also transitions seamlessly from stovetop to oven, letting you build the sauce and bake the dish in one vessel. If you're cooking on an induction cooktop, make sure your cast iron or stainless-steel pan is induction-compatible. A standard 9×13-inch ceramic or glass baking dish works well for larger batches baked entirely in the oven.
Q: Can I make crustless chicken pot pie in a slow cooker?
Yes. Combine diced raw chicken, vegetables, chicken broth, seasonings, and aromatics in the slow cooker and cook on LOW for 6–7 hours or HIGH for 3–4 hours. In the final 20 minutes, stir in a slurry of 2 tablespoons cornstarch dissolved in 3 tablespoons cold water, replace the lid, and cook on HIGH until the filling thickens. Add the milk or cream only at this stage to prevent curdling during the long cook.