The Best Shake N Bake Chicken Recipe: Crispier Than the Box
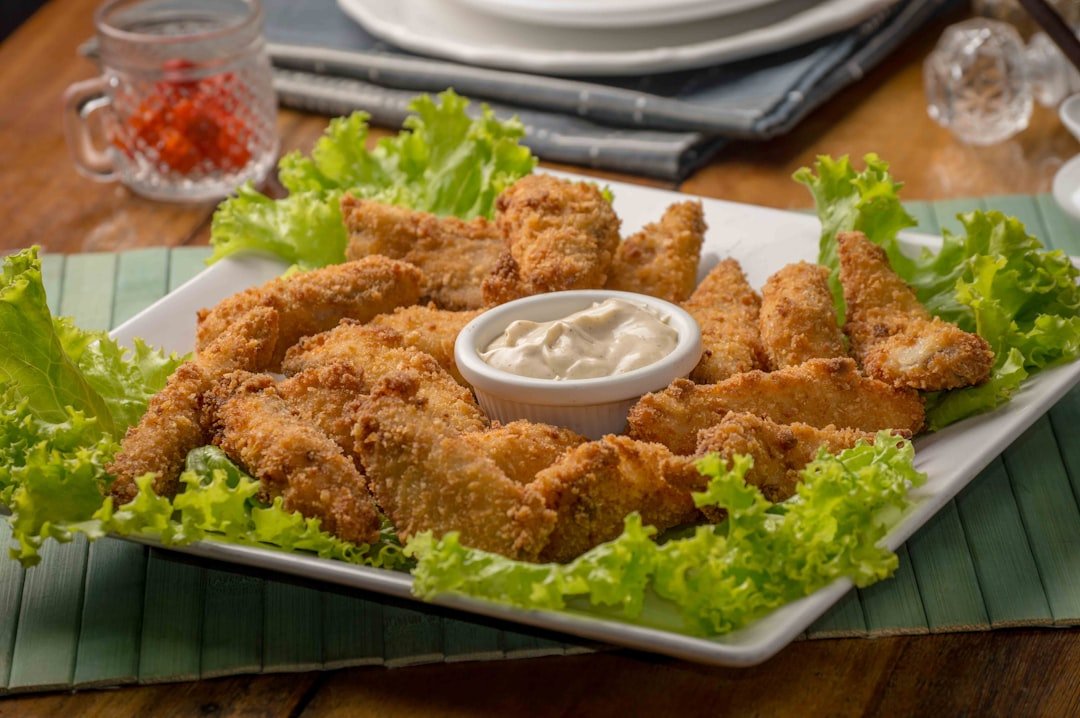
Shake n bake chicken is exactly what weeknight dinners should be: simple to prepare, satisfying to eat, and reliably delicious. At its core, it's a baked, breaded chicken recipe where seasoned breadcrumbs are shaken onto chicken pieces in a bag, then baked at 400°F for 35–40 minutes until the coating is golden and crispy. No deep fryer, no mess, and no guesswork.
What separates a genuinely great result from an average one is ditching the boxed mix. When you build your own seasoning blend, you control the sodium level, the heat, and the crunch quality in ways a pre-packaged product simply can't match. A Table Full of Joy puts it well: homemade coatings are fresher, more flavorful, and far more adaptable to your family's preferences.
Before you even think about seasoning, there's one step that matters more than any ingredient: patting the chicken completely dry. Surface moisture is the enemy of a crispy crust, and skipping this step will cost you. Equally important is how you set up your pan. Baking on a wire rack placed over a rimmed sheet pan lets hot air circulate underneath each piece, preventing the dreaded soggy bottom that ruins an otherwise good result. Healthy Fitness Meals confirms this rack method as a key step in getting the coating right.
The payoff is restaurant-quality crispy chicken in under 45 minutes. If you're looking for more recipes and cooking techniques to build on, explore our food category for ideas that go well beyond shake n bake.
How to Make Shake N Bake Chicken from Scratch: Technique, Seasoning, and Pro Tips
Choosing Your Chicken Cut
The cut you choose determines how your final dish tastes and how forgiving the recipe is to cook. Bone-in, skin-on chicken thighs and drumsticks are the best option here. Their higher fat content keeps the meat moist throughout the full 35–40 minute bake while the breadcrumb coating crisps up beautifully on the outside. Drumsticks in particular are ideal for families because they're easy to handle and consistently sized.
If you prefer boneless chicken breasts, they'll work, but you'll need to pound them to an even 1-inch thickness first. Without this step, the thinner edges will overcook and the coating there may scorch before the center reaches the safe internal temperature of 165°F (74°C). Always verify doneness with an instant-read thermometer inserted into the thickest part of the meat, away from any bone.
The From-Scratch Seasoning Blend
This is where homemade shake n bake genuinely outperforms anything from a box. The Modern Proper's homemade shake and bake recipe demonstrates just how straightforward the ingredient list can be. Our blend, developed and tested by Sophia Garcia using her professional kitchen experience, is:
- 1 cup panko breadcrumbs
- 2 tbsp fine breadcrumbs
- 1 tsp smoked paprika
- 1 tsp garlic powder
- 1 tsp onion powder
- ½ tsp dried oregano
- ½ tsp black pepper
- 1 tsp salt
- ¼ tsp cayenne
- 1 tbsp neutral oil (avocado or vegetable)
Panko is non-negotiable. Its larger, drier flakes create more surface area for crisping and absorb far less moisture during baking than standard fine breadcrumbs, which is why it dominates the blend. The Cookful's copycat shake and bake chicken also highlights panko as the superior choice for home baking.
Smoked paprika is specifically chosen over sweet paprika because it adds a subtle char-like depth that mimics the flavor of grilled skin, without any extra cooking steps. It's a small swap that makes a noticeable difference.
The tablespoon of neutral oil mixed directly into the dry seasoning is something many home recipes leave out. It allows the coating to brown evenly through conduction heat without requiring a separate oil spray, and it makes the finished crust noticeably more golden and rich.
Preparing the Chicken Before Coating
Start by pulling the raw chicken from your refrigerator. Proper storage matters here: raw chicken should be kept at or below 40°F (4°C) and used within 1–2 days of purchase. Not only is this a food safety requirement, but fresher chicken has a firmer surface texture that holds the coating better. Our guide on refrigerator temperature settings for food safety covers exactly what temperature range you should be maintaining.
Once the chicken is out, use a sharp chef's knife to trim any excess fat or overhanging skin. Jagged, uneven edges created by a dull blade lead to uneven coating thickness and hot spots during baking. If your knives need attention, our roundup of best knife sharpening tools for home chefs is worth a look before your next prep session.
Pat every piece completely dry with paper towels. This isn't optional. Surface moisture will steam the coating from the inside during baking, turning what should be a crunchy crust into something soft and limp. Dry chicken is the foundation of everything that follows.
The Adhesive Layer: Egg Wash vs. Mayonnaise
To get the seasoning blend to bond to the chicken's surface, you need an adhesive layer. Beat 1 egg with 1 tablespoon of water and apply a light, even coat over each piece before shaking. If you don't have eggs on hand or want a richer result, a thin layer of plain mayonnaise works just as well and adds a subtle richness to the finished crust. For more on the role eggs play in cooking, our types of eggs explained guide is a helpful reference.
One thing to be clear about: this adhesive layer is not a seasoning step. Don't add salt or spices to the chicken itself before coating. The homemade blend already contains the correct salt ratio calibrated to the amount of breadcrumbs and the quantity of chicken. Adding salt separately risks over-seasoning the dish and can tighten the surface proteins, which affects tenderness. This is a point that many popular recipes gloss over. Adventures of a Nurse's viral Facebook post on homemade shake and bake chicken gets a lot right, but pre-seasoning the chicken before the coating is where careful technique separates good results from great ones.
Oven Setup and Baking
Oven rack position is something most home cooks don't think about, but it matters. Place the rack in the upper-middle position. This gives the chicken direct radiant heat from the top element while keeping it far enough away to avoid scorching the coating. The very top rack is too close and will brown the outside before the inside is done.
Set a wire rack over a rimmed baking sheet and arrange the coated chicken pieces on the rack without overcrowding. Direct contact with foil traps steam under the coating and creates the soggy bottom problem that frustrates most people when they first try this recipe. A Table Full of Joy and Healthy Fitness Meals both point to the rack method as essential.
Bake at 400°F for 35–40 minutes for bone-in pieces, or 22–25 minutes for boneless breasts. If you're using a convection oven, drop the temperature to 375°F and start checking for doneness at the 28-minute mark. Forced air circulation cooks the coating faster and more evenly than a conventional oven. For a deeper look at how convection compares to other methods, our guide on microwave vs convection oven baking is worth reading before you decide which oven setting to use. Explore our oven and stove buying guides if you're also considering upgrading your equipment.
Cast Iron as an Alternative
If you want to maximize crunch on both the top and bottom of the chicken, a preheated cast iron pan is an excellent alternative to the wire rack setup. Place your cast iron dish in the oven for 10 minutes before adding the coated chicken. The hot surface sears the bottom coating on contact, creating a double-sided crunch that's genuinely impressive. Just remember that cast iron requires proper maintenance. Our guide on how to clean cast iron will keep yours in good shape. If you're also considering induction cooking, our guide to best cookware for induction cooktops covers which materials work best, and you can browse our full cookware guides for more options.
Variations Worth Trying
Once you've mastered the base recipe, the blend adapts easily in three directions:
Spicy: Add ½ tsp chipotle powder to the dry blend and 1 tsp hot sauce to the egg wash. The heat penetrates both the adhesive layer and the coating for warmth in every bite.
Herb-Crusted: Swap the dried oregano for 1 tsp dried rosemary and 1 tsp dried thyme, then fold in 2 tbsp finely grated Parmesan. The result is a golden, aromatic crust that feels more elevated than a standard weeknight recipe.
Gluten-Free: Replace the panko with certified gluten-free rice breadcrumbs or crushed gluten-free rice crackers at a 1:1 ratio. The crunch is nearly indistinguishable from the wheat-based original, and all the other seasoning ingredients are naturally gluten-free.
Your Shake N Bake Chicken Will Never Be the Same
Once you've made this recipe from scratch, going back to a boxed mix feels unnecessary. The combination of smoked paprika, panko, and garlic powder consistently delivers more crunch, more flavor depth, and far better sodium control than anything pre-packaged.
Three technique steps are truly non-negotiable: pat the chicken completely dry before coating, use a wire rack over a sheet pan, and position the oven rack in the upper-middle slot. Get those three things right and you'll have a result that holds up to anything you'd order at a restaurant.
The spicy, herb-crusted, and gluten-free variations all follow the same core method, so once you learn it, you've got a reliable framework for dozens of variations. And the right kitchen tools matter just as much as technique. Understanding heat control, like the principles covered in our guide to mastering heat control in the kitchen, carries over into every dish you cook.
At The Top Kitchen, Sophia Garcia draws on decades of professional kitchen experience to help home cooks get consistently great results. Whether you're shopping for cookware, troubleshooting a recipe, or comparing appliances, you'll find detailed, chef-informed guidance across every category.
Shake N Bake Chicken: Frequently Asked Questions
Q: Do you season chicken when using Shake and Bake?
No. When using a homemade shake and bake seasoning blend, don't add extra salt or seasoning directly to the raw chicken. The coating mix is already formulated with the correct salt-to-breadcrumb ratio for the quantity of chicken you're coating. Adding salt separately risks over-seasoning the dish and can tighten the surface proteins, making the chicken less tender. The only addition recommended before coating is a thin layer of egg wash or mayonnaise, which acts purely as an adhesive to help the breadcrumbs stick. The same rule applies to the original boxed product: the sachet contains its own seasoning, so no pre-seasoning is needed. The Cookful's copycat shake and bake recipe and Healthy Fitness Meals both reinforce this approach.
Q: What is the best chicken cut for shake n bake?
Bone-in, skin-on chicken thighs and drumsticks are the best cuts because their natural fat content keeps the meat moist during the full 35–40 minute bake, while the exterior coating crisps thoroughly. Boneless chicken breasts work but must be pounded to an even 1-inch thickness to ensure the coating doesn't burn before the interior reaches 165°F.
Q: How do you keep shake n bake coating crispy?
Always pat the chicken completely dry before applying the egg wash. Bake on a wire rack set over a rimmed sheet pan so hot air circulates underneath each piece. Place the oven rack in the upper-middle position at 400°F, and don't cover the chicken with foil at any point during baking.
Q: Can you make shake n bake chicken gluten-free?
Yes. Substitute the panko with certified gluten-free rice breadcrumbs or finely crushed gluten-free rice crackers at a 1:1 ratio. The coating crunch and color are nearly identical. All other seasoning ingredients are naturally gluten-free, so no further changes are required.
Q: What temperature do you bake shake n bake chicken?
Bake at 400°F (205°C) in a conventional oven for 35–40 minutes for bone-in pieces, or 22–25 minutes for boneless breasts, until the internal temperature reaches 165°F (74°C) as verified by an instant-read thermometer. In a convection oven, reduce to 375°F and begin checking at 28 minutes, since forced-air circulation accelerates browning.