How to Boil Eggs: The Quick Answer + What You Need to Know
To boil a hard egg, place refrigerator-cold eggs into already-boiling water and cook for exactly 12 minutes, then immediately transfer them to an ice bath for at least 5 minutes. That's the boiling-water-start method, and it's what we use here at The Top Kitchen because it gives you the most consistent yolk control.
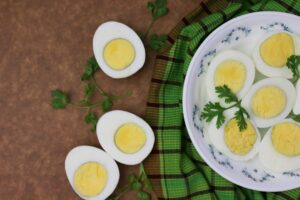
Timing is everything. Using this method, 6 minutes gives you a soft boiled egg with a runny, golden yolk; 9 minutes produces a medium boiled egg with a jammy, semi-set center; and 12 minutes delivers a fully hard boiled egg. For the full breakdown of timing by doneness level, see our guide on How Long to Boil Eggs Hard Boiled.
Two details shape your results more than anything else. First, the ice bath isn't optional. If you skip it, carryover cooking continues inside the shell and can add up to 2 extra minutes of heat to the yolk, pushing a perfectly set egg toward rubbery or green-ringed territory, as RecipeTin Eats explains in their boiled egg guide. Second, egg age matters for peeling. Eggs that are 7 to 14 days old peel dramatically more easily than very fresh eggs because the rise in pH between the shell and the white creates a natural separation layer.
It's also worth knowing that starting with cold eggs straight from the refrigerator (rather than room-temperature eggs) adds roughly 1 minute to all timing windows. The timings above already account for that, and Food & Wine's testing confirms that cold-start timing produces more reliable results when you're cooking from the fridge.
Not sure which egg variety works best for boiling? Our Types of Eggs Explained guide covers the differences so you can start with the right ingredient.
What You Need Before You Start: Ingredients, Equipment & Egg Freshness
Getting the setup right makes the actual cooking almost automatic. Here's what you'll need.
Equipment:
- A medium saucepan (2 to 3 quart capacity) filled with enough water to cover your eggs by at least 1 inch. Too little water causes uneven heat distribution, which means some eggs cook faster than others.
- A slotted spoon or spider strainer to lower eggs gently into the boiling water one at a time. Dropping eggs causes micro-cracks that let whites leak and create a tough, stringy exterior.
- A kitchen timer with seconds display. A 60-second difference in boiling time is genuinely noticeable in yolk texture, so precision matters more than you'd expect.
- A large bowl for the ice bath with at least a 1:1 ratio of ice to cold water, deep enough to fully submerge all your eggs.
Eggs:
Large Grade A or AA eggs are the standard baseline for every timing chart we publish. If you're using jumbo eggs, add 1 to 2 minutes to your cook time. Small eggs need 1 to 2 fewer minutes.
For best results with hard boiled eggs specifically, use eggs that have been refrigerated for 7 to 14 days. Fresh farm eggs under 3 days old are notoriously difficult to peel cleanly because the inner membrane bonds tightly to the white at low pH. Before you cook, it's worth doing a quick freshness check using the float test: a fresh egg sinks flat to the bottom, a week-old egg tilts slightly upward, and an egg that floats to the surface has gone bad and should be discarded. Our Egg Float Test Freshness Guide walks you through exactly how to read the results.
For a broader look at egg varieties and which ones suit different cooking methods, our types of eggs guide is a helpful starting point. RecipeTin Eats also covers ingredient prep well if you want a second perspective before you begin.
Step-by-Step: How to Boil Eggs From Soft to Hard (With Timing Chart)
Follow these steps in order and you'll get consistent results every single time.
Step 1: Bring the water to a full rolling boil first.
Fill your medium saucepan with enough cold water to cover your eggs by at least 1 inch. Place it over high heat and bring it to a full rolling boil before you add any eggs. This is the key difference between the boiling-water-start method and the cold-start method, and it's where your control over yolk texture begins.
Step 2: Lower eggs in gently, one at a time.
Use a slotted spoon to lower each egg carefully into the boiling water. Don't drop them. Dropping eggs, even from an inch above the water, causes micro-cracks that allow water to seep under the shell and produce a leathery, stringy white on the outside. RecipeTin Eats recommends this approach for the same reason we do: it protects the structure of the egg from the start.
Step 3: Reduce to a steady medium boil.
Once all eggs are in, reduce heat to a steady medium boil. A violent rolling boil throws eggs against each other and the sides of the pan, which leads to cracking. You want consistent, even heat, not aggressive bubbling.
Step 4: Set your timer based on your target doneness.
| Doneness | Boiling-Water-Start | Cold-Start (from boil) |
|---|---|---|
| Soft (runny yolk) | 6 minutes | 8 minutes |
| Medium (jammy center) | 9 minutes | 11 minutes |
| Hard (fully set yolk) | 12 minutes | 13 minutes |
For a deeper look at how timing affects texture at every minute interval, our Boiled Egg Cooking Times Soft Hard chart and How Long to Boil Egg Soft Hard guide give you the full picture. Food & Wine and The Turquoise Table both tested similar timing ranges and arrived at comparable results for the boiling-water-start approach.
Many popular cooking blogs advocate for the cold-start method (placing eggs in cold water and bringing everything to a boil together) because it reduces the risk of cracking. It's a forgiving approach for beginners. That said, the boiling-water-start method consistently gives better yolk control and produces easier-to-peel eggs, which is why professional chefs prefer it. For our Hard Boiled Egg Boiling Time reference page, we use the boiling-water-start timings as the standard.
Step 5: Prepare the ice bath while eggs cook.
You'll need at least 2 cups of ice and enough cold water to fully submerge all your eggs. Have this ready before your timer goes off, because every second counts once you pull the eggs from the heat.
Step 6: Transfer immediately and leave for at least 5 minutes.
When the timer sounds, move eggs straight to the ice bath using your slotted spoon. Leave them submerged for a minimum of 5 minutes. For hard boiled eggs, 10 minutes is even better. This stops carryover cooking in its tracks and makes the shell easier to remove.
Step 7: Peel using the wide-end method.
Tap the wide end of the egg firmly on the counter, then roll it gently to create a web of fine cracks across the shell. Peel starting from the wide end, where the air pocket sits, under a thin stream of running water. The water gets under the membrane and makes the shell slide off more cleanly.
A note on altitude: If you're cooking above 3,500 feet, water boils at around 203°F rather than 212°F at sea level. That lower temperature means you'll need to add 1 to 2 minutes to all the timings above.
What causes the green ring? If you see a grey-green ring around the yolk, the egg was overcooked. Iron in the yolk reacted with hydrogen sulfide in the white to form iron sulfide. It's harmless, but it means the egg cooked for longer than about 14 minutes at a full boil. The ice bath is your best defense.
Prefer a hands-off approach? The Instant Pot Hard Boiled Eggs Method (5 minutes pressure, 5 minutes natural release, 5 minutes ice bath) produces consistently easy-to-peel results and takes the guesswork out entirely.
Pro Tips for Perfect Hard Boiled Eggs Every Time (And How to Use Them)
Make peeling easier with baking soda. Add 1 teaspoon of baking soda to the boiling water before you add the eggs. It raises the water's pH, which helps loosen the shell membrane and makes peeling noticeably easier, especially if you're working with eggs that are fresher than ideal. The Turquoise Table covers this tip in their hard boiling guide as well.
Prevent cracking before you even start. Use a pin to pierce the wide end of each egg before boiling. This releases air from the air cell inside the shell, which is the most common cause of cracking during cooking. It's a standard technique in professional restaurant prep and takes about 10 seconds per batch.
Keep whites tender, not rubbery. Tough, rubbery whites come from boiling at too high a temperature. Reducing to a steady medium boil after you add the eggs keeps whites soft and fully set at the same time.
Store them correctly. Shell-on hard boiled eggs keep well in the refrigerator for up to 7 days. Peeled eggs should be stored submerged in cold water inside an airtight container and eaten within 5 days. See our guide on How Long Are Eggs Good in the Refrigerator for storage advice that covers both raw and cooked eggs.
Batch cooking tips. For meal prep, you can easily cook 6 to 12 eggs at once. The water volume should still cover all eggs by at least 1 inch, so move up to a larger pot for bigger batches. The timing doesn't change as long as coverage is maintained.
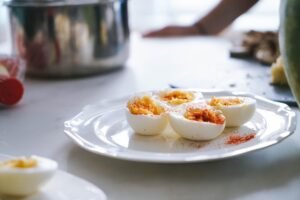
Deviled eggs need exactly 12 minutes. Hard boiled eggs are the starting point for deviled eggs, and the yolk texture matters enormously for a smooth filling. Cook to exactly 12 minutes, chill thoroughly in the ice bath, and slice with a sharp, thin-bladed knife to get clean halves without tearing the white. Our Devilled Egg Perfect Results Guide walks through the full recipe from shell to filling. For more on getting consistently great hard boiled eggs as a base, our How to Hard Boil Eggs Perfectly guide covers every variable in detail.
Nutrition at a glance. One large hard boiled egg provides approximately 78 calories, 6 grams of protein, and 5 grams of fat. It's also one of the few foods that naturally contains vitamin D, making it a genuinely efficient source of nutrition for the effort involved.
Interested in poaching instead? Poached eggs require a different setup: 3 inches of gently simmering water (not a rolling boil), a splash of white vinegar, and a cook time of 3 to 4 minutes after you slide the egg in from a small cup. If you'd rather skip the stovetop entirely, our guide on How to Do a Poached Egg in Microwave shows you how a small ramekin, 3 tablespoons of water, and 60 to 80 seconds at 80% power gets you surprisingly close results with much less mess.
Frequently Asked Questions About Boiling Eggs
Q: How long do you boil eggs for hard boiled eggs?
Boil eggs for 12 minutes using the boiling-water-start method for fully hard boiled eggs with a completely set yolk. Lower cold eggs into already-boiling water, cook for 12 minutes at a steady medium boil, then immediately transfer to an ice bath for at least 5 minutes to stop cooking. RecipeTin Eats and Food & Wine both arrive at the same 12-minute benchmark through independent testing.
Q: Why do my hard boiled eggs have a green ring around the yolk?
The green-grey ring is caused by overcooking. When eggs are boiled too long or left sitting in hot water after cooking, iron in the yolk reacts with hydrogen sulfide in the white to form iron sulfide, a harmless but unappealing grey-green compound. To prevent it, cook for no more than 12 minutes and use an ice bath immediately after.
Q: How do you make hard boiled eggs easy to peel?
Use eggs that are 7 to 14 days old rather than very fresh eggs. Older eggs have a higher internal pH that naturally loosens the membrane from the shell. Start eggs in already-boiling water (not cold water), and always use an ice bath immediately after cooking. Optionally, add 1 teaspoon of baking soda to the boiling water to further raise pH and ease peeling.
Q: Can you boil eggs straight from the refrigerator?
Yes, you can boil eggs straight from the refrigerator. Cold eggs add approximately 1 minute to all timing windows, but all standard timing charts, including 6 minutes for soft, 9 for medium, and 12 for hard, already assume refrigerator-cold eggs. No additional adjustment is needed if you follow those guidelines.
Q: How long do hard boiled eggs last in the fridge?
Hard boiled eggs with the shell on last up to 7 days in the refrigerator. Peeled hard boiled eggs should be stored submerged in cold water in an airtight container and consumed within 5 days. Change the water daily to maintain freshness. For more storage guidance, see our How Long Are Eggs Good in the Refrigerator guide.
Q: What is the difference between the cold-start and boiling-water-start method for boiling eggs?
The cold-start method means placing eggs in cold water and bringing them to a boil together. It's more forgiving for beginners and reduces cracking risk, but it produces slightly harder-to-peel eggs and requires longer timing. The boiling-water-start method means lowering eggs into already-boiling water. It gives more precise yolk control, easier peeling, and is the method preferred by professional chefs.
Q: How do you poach eggs properly?
To poach eggs, bring 3 inches of water to a gentle simmer (not a rolling boil) in a wide saucepan and add a splash of white vinegar. Crack each egg into a small cup first, then swirl the water to create a gentle vortex and slide the egg in from the cup. Cook for 3 minutes for a runny yolk or 4 minutes for a semi-set yolk, then remove with a slotted spoon and drain on a paper towel. For a full overview of all the ways you can prepare eggs, our Ways to Cook Egg guide is a great place to start.