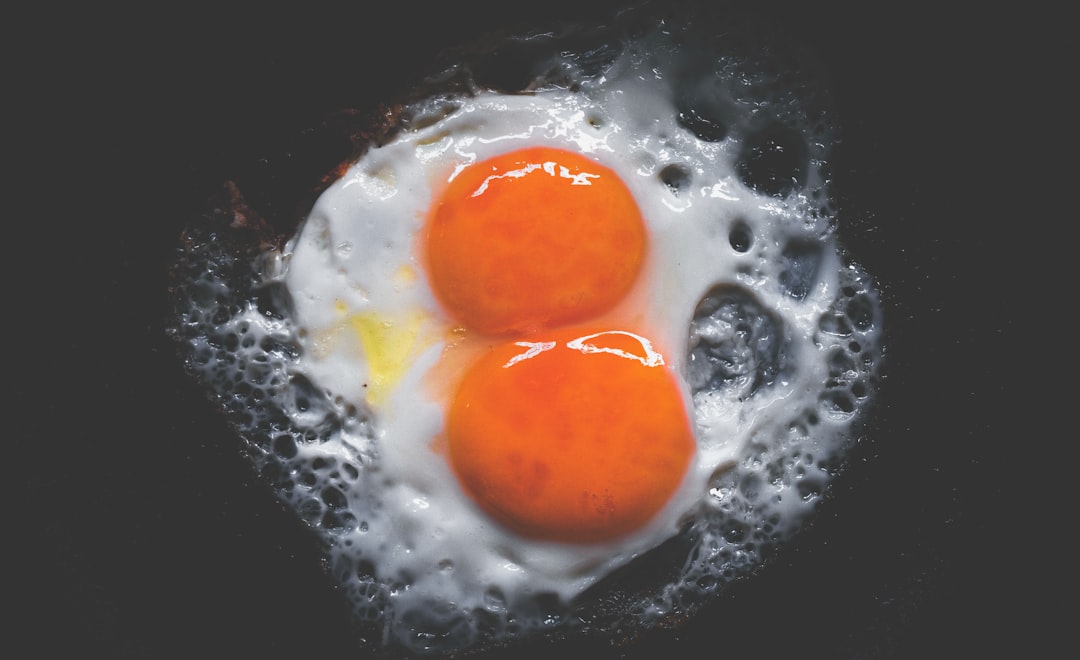
Eggs over easy are fried eggs that have been flipped once in the pan and cooked briefly on the second side, leaving the whites completely set while the yolk stays fully runny. That flowing yolk is the whole point, and getting it right comes down to heat control, timing, and a confident flip. Whether you're cooking breakfast for yourself or feeding a crowd, this guide walks you through every step.
What Are Eggs Over Easy?
Eggs over easy are fried eggs flipped once and cooked briefly on the second side so the whites are fully set but the yolk remains completely runny. The name follows a simple logic: "over" means the egg was flipped in the pan, and "easy" describes the yolk's doneness level. Easy means runny. Move up the scale and you get over medium, where the yolk is slightly thickened and jammy, or over hard, where the yolk is cooked solid all the way through.
This style differs from sunny side up in one key way: sunny side up eggs never get flipped. They cook entirely on one side, leaving the yolk surface exposed, glossy, and technically uncooked. Over easy eggs, by contrast, get that brief second-side cook that sets the thin yolk membrane while the interior stays liquid.
If you'd like to understand the full range of egg varieties before you start, our Types of Eggs Explained guide is a good starting point. And if you're curious about other cooking methods beyond frying, our Ways to Cook Egg guide covers everything from poaching to steaming.
Mastering eggs over easy is one of the most fundamental stovetop skills a home cook can build. It demands precise heat control and a quick, decisive wrist motion during the flip. The quality of your egg matters just as much as your technique. Fresh eggs have tighter, more cohesive whites that hold their shape, making them far easier to flip cleanly. Older eggs spread wide and run thin, and they're much more likely to break at the worst possible moment. Check how long your eggs have been sitting with our guide to How Long Are Eggs Good in the Refrigerator before you start cooking.
Instructables' egg cooking basics and this walkthrough from She Made It, She Might are both solid references that reinforce why technique and freshness go hand in hand for this style.
What You Need Before You Start
Getting your equipment and ingredients right before the egg hits the pan makes every step easier.
Pan choice matters. A non-stick pan is the most forgiving option for beginners. Its slick surface stops the egg white from bonding to the pan during the flip, which is the moment things tend to go wrong. If you want to use stainless steel, you'll need to preheat the pan fully and use enough fat that the oil moves like liquid mercury when you tilt the pan. That's often called the "mercury ball" test, and it tells you the surface is hot enough to be non-stick before the egg goes in. Cast iron is another excellent option, but its thermal mass makes temperature correction slow. You need to dial the heat back earlier than feels natural, because the pan keeps cooking even after you lower the burner. For recommendations on pans that work well across different cooktops, our Best Cookware for Induction Cooktops guide covers the key differences.
Fat selection. Unsalted butter is our top pick for beginners because it acts as a built-in thermometer. Butter foams gently at around 250 to 300°F, which is the sweet spot for eggs over easy. If it browns or smells nutty, the pan is above 350°F and too hot. Neutral oils like avocado or light olive oil have higher smoke points and are a better fit for cast iron or when you're cooking multiple batches back to back.
Your spatula. Use a thin, flexible spatula with a beveled edge. It needs to slide cleanly under the egg white in one smooth motion without tearing it. A thick or rigid spatula will catch on the white and break the yolk before you even attempt the flip.
Egg freshness. Only cook eggs that you know are fresh. Older eggs have watery, thin whites that spread wide in the pan and are much more likely to break during flipping. Use our Egg Float Test Freshness Guide to check before you cook, and see our How Long Eggs Last guide to understand storage timelines. If you want to start with the best possible eggs from the start, our Vital Farms Egg Buyers Guide covers what to look for at the store.
Take your eggs out of the refrigerator about 10 minutes before cooking. Cold eggs cause the fat in the pan to seize and can lead to unevenly cooked whites. This is a small step that makes a real difference, as confirmed by both r/cookingforbeginners community advice and She Made It, She Might's method breakdown.
How to Make Eggs Over Easy: Step-by-Step
The whole process takes about 2.5 to 3.5 minutes from egg hitting pan to plate. Every second counts, so have your plate ready before you start.
Step 1: Preheat your pan. Set the burner to low or medium-low heat and let the pan warm up for 1 to 2 minutes before adding any fat. This ensures the surface is uniformly warm and eliminates hot spots that cook the white unevenly.
Step 2: Add your fat. Add one teaspoon of butter or oil and let it spread across the entire pan surface. If you're using butter, wait until it foams gently but hasn't started to brown. That foam tells you the pan is at roughly 275°F, which is exactly where you want it.
Step 3: Crack the egg into a bowl first. Don't crack directly into the pan. Cracking into a small bowl first lets you remove any shell fragments and check the yolk for breaks before it touches the heat. A broken yolk before it even hits the pan is a wasted egg.
Step 4: Slide the egg into the pan. Hold the bowl low and close to the pan surface, then gently slide the egg into the center. Keeping the drop height short prevents the yolk from breaking on impact.
Step 5: Cook on the first side. Cook uncovered for 2 to 3 minutes. Watch the white: it should turn fully opaque from the edges inward, until only about half an inch around the yolk is still slightly translucent.
Step 6: The shake test. Gently shake the pan. If the white moves as one solid piece, it's ready to flip. If the white near the yolk still ripples like liquid, give it another 30 seconds. Don't rush this step. A white that isn't fully set will tear or fold during the flip. This technique is well-documented in Instructables' egg basics guide and the r/cookingforbeginners thread on over easy eggs.
Step 7: Flip. Slide the spatula fully under the egg white in one smooth, confident motion. Lift and flip the egg away from your body in a single quick movement. The goal is to minimize air time so the yolk doesn't slam into the pan on landing. Hesitation is your enemy here. This short video demonstration shows exactly how the motion should look.
Step 8: Cook on the second side. This is where over easy and over medium part ways. Cook for exactly 15 to 30 seconds only. Any longer and the yolk starts to firm up, turning your over easy egg into something closer to over medium. Pull the pan off the heat at the 20-second mark if you're unsure.
Step 9: Plate and season. Slide the egg onto a plate yolk-side up, season immediately with salt and freshly ground black pepper, and serve within 60 seconds. The yolk should be warm and fully fluid. Season after plating, not before, for reasons explained in the tips section below.
She Made It, She Might's step-by-step guide mirrors this sequence closely and is worth bookmarking as a quick visual reference.
Chef Tips for Perfect Over Easy Eggs Every Time
Lower heat than you think. The single most common mistake home cooks make is cooking on too-high heat. High heat causes the white to bubble, puff, and develop rubbery browned edges before the center near the yolk has time to set. If your white looks like it's frying in a fast-food basket, the heat is too high.
Use the lid trick. Covering the pan with a lid for the final 30 to 45 seconds of the first-side cook traps steam, which gently sets the top of the white near the yolk. This makes the flip significantly safer because the entire white is solid before you move it. This method is popular in communities like r/cookingforbeginners and shown in this no-flip steam hack on Facebook.
Use a bigger pan. Sophia's restaurant habit is to use a pan one size larger than feels necessary. When the egg has room to spread without touching the pan edges, it cooks more evenly and doesn't stick at the perimeter.
Season after plating. Salting the egg before flipping draws moisture out of the white through osmosis, creating small weak spots that are more likely to tear when you flip. Always season after the egg is on the plate.
Have a backup egg ready. If you break a yolk during the flip, add a second egg to the pan immediately and treat the broken one as a practice run. Professionals always crack a spare before they start.
No-flip vs. true over easy. The steam-lid method produces a visually similar result, but the yolk gets a slightly milky, opaque film on top. It's a great option if you're nervous about flipping, but it's technically not a true over easy egg in terms of texture. See She Made It, She Might's notes on this for a clear comparison.
Cast iron users: reduce heat early. Because cast iron holds heat so well, you need to turn the burner down one full setting before it feels necessary. The residual heat keeps cooking the egg even after you reduce the flame. Keeping your cast iron in good shape also affects how well eggs release. Our guide on How to Clean Cast Iron covers proper seasoning and maintenance.
Keep your eggs stored correctly between cooking sessions. Our Refrigerator Temperature Settings Food Safety guide explains the ideal temperature range to keep eggs at their best.
If you don't have stovetop access, our guides on How to Do a Poached Egg in the Microwave and Microwave Scrambled Eggs cover reliable alternative methods.
Eggs Over Easy: Frequently Asked Questions
What is the egg over easy?
An egg over easy is a fried egg that has been flipped once in the pan. The white is fully cooked and set on both sides, while the yolk remains completely liquid and runny inside. It is one of the four standard styles of fried egg and is the go-to choice for anyone who wants a yolk that flows when pierced.
What are the 4 types of fried eggs?
The four types of fried eggs are: (1) Sunny side up, cooked on one side only, never flipped, with a fully runny yolk and often slightly translucent whites near the yolk; (2) Over easy, flipped once, whites fully set, yolk completely runny; (3) Over medium, flipped once, whites fully set, yolk partially set with a jammy or custardy center; (4) Over hard, flipped once and cooked until the yolk is fully solid with no runniness remaining. Our Types of Eggs Explained guide covers these styles and more in depth.
What's the difference between over easy and sunny side up?
The key difference is whether the egg is flipped. Sunny side up eggs cook entirely on one side and are never flipped, leaving the yolk surface exposed, glossy, and uncooked. Over easy eggs are flipped once and cooked for 15 to 30 seconds on the second side, which fully sets the white on both sides and cooks the outer membrane of the yolk while keeping its interior completely runny. Both styles are detailed in Instructables' cooking basics guide and She Made It, She Might's breakdown.
What does it mean if eggs are over easy?
When eggs are described as over easy, it means they've been fried, flipped once, and cooked just long enough on the second side for the whites to be fully set while the yolk remains soft and liquid. The word "over" refers to the egg being flipped over in the pan, and "easy" describes the yolk doneness. Easy means runny, in contrast to medium (jammy) or hard (fully cooked through).