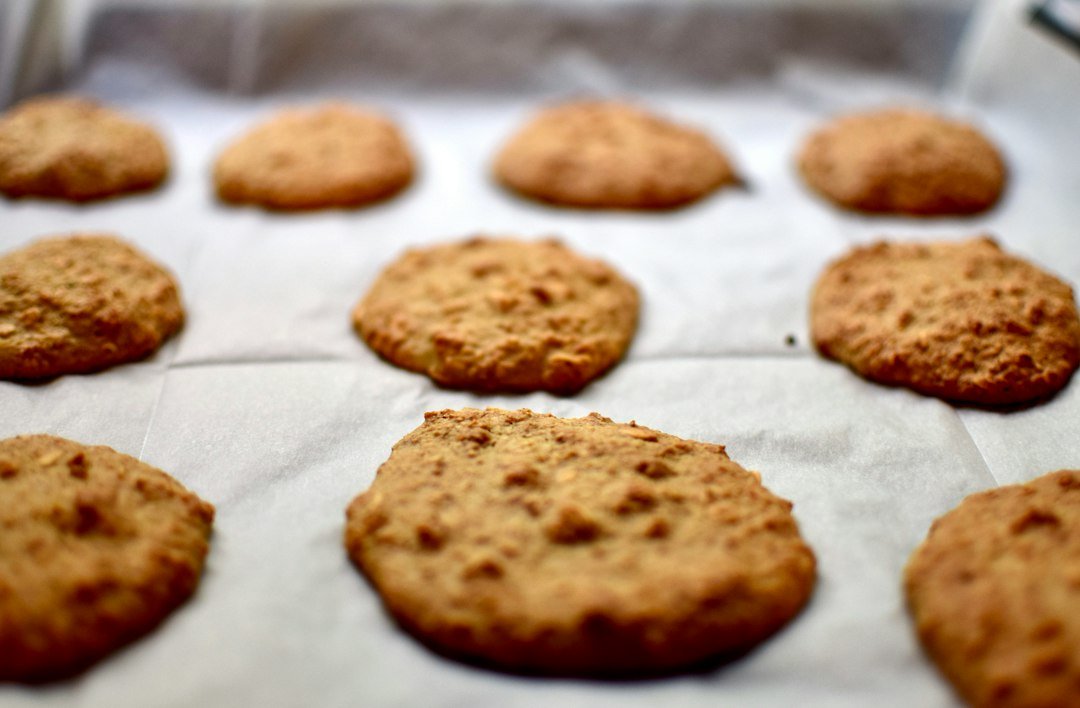
The Best Oat and Raisin Biscuits Recipe (Chewy or Crispy – Your Choice)
Whether you call them biscuits or cookies depends entirely on which side of the Atlantic you're on. In the UK, a biscuit is exactly what Americans call a cookie, and this oat and raisin biscuit recipe delivers the same golden, oat-packed result regardless of the name you use. You'll find it in our Food Category alongside a full range of recipes and kitchen guides.
The core formula is straightforward: rolled oats, plain flour, butter, brown sugar, one egg, vanilla extract, and raisins. From the moment you start mixing to the moment the first biscuit hits the cooling rack, you're looking at under 30 minutes of active effort. The recipe yields approximately 20 biscuits per batch.
One ingredient swap makes the biggest difference to texture. Using light brown sugar instead of white sugar is the single most important change you can make. Brown sugar contains molasses, which adds moisture to the dough and creates that signature chewy, caramel-flavoured result that Sally's Baking Addiction describes as the hallmark of a great oatmeal raisin cookie.
An oat and raisin biscuit recipe, at its best, combines rolled oats, plain flour, butter, brown sugar, egg, vanilla extract, cinnamon, and raisins, baked at 180°C (350°F) for 10 to 13 minutes to produce 20 golden biscuits.
One technique that makes a real difference is soaking your raisins in warm water or orange juice for 10 minutes before they go into the dough. This prevents them from drawing moisture out of the biscuit during baking and gives you a plump, juicy burst of fruit in every bite, as RecipeTin Eats highlights in their oatmeal raisin cookie guide. If you want a crispier biscuit rather than a chewy one, all you need to do is extend the baking time by 2 to 3 minutes. Everything else stays the same.
What You Need Before You Start: Ingredients & Equipment
The two most critical ingredients for chewy oat and raisin biscuits are rolled oats (not quick oats) and light brown sugar (not white sugar). Those two choices shape the texture more than anything else in the recipe.
Full Ingredient List
| Ingredient | Quantity |
|---|---|
| Rolled oats (old-fashioned) | 200g |
| Plain flour | 100g |
| Unsalted butter, room temperature | 115g |
| Light brown sugar | 150g |
| Large egg | 1 |
| Vanilla extract | 1 tsp |
| Ground cinnamon | 1 tsp |
| Bicarbonate of soda | ½ tsp |
| Salt | ¼ tsp |
| Raisins | 150g |
The 2:1 ratio of oats to flour (200g oats to 100g flour) is intentional. It keeps the biscuit structured without making it crumble. AllRecipes' classic oatmeal raisin cookie and Quaker Oats' vanishing oatmeal raisin cookie both follow a similar balance for exactly this reason.
Rolled oats (sometimes called old-fashioned oats) give you a chewier, heartier biscuit than quick oats. Quick oats are pre-steamed and cut into smaller pieces, so they absorb moisture faster, which produces a denser, flatter result. Professional bakers consistently recommend rolled oats, and Sally's Baking Addiction agrees that this choice directly affects the final texture. If you need a gluten-free version, certified gluten-free rolled oats are the only oat substitution required, since standard oats are often processed in facilities that also handle wheat. See our Gluten Free Christmas Biscuit Guide for more detail on adapting biscuit recipes.
Your butter must be at room temperature, not melted. This is non-negotiable. Melted butter shifts the texture towards flat, greasy biscuits because it can't trap air during creaming. Room-temperature butter holds its shape but yields to the mixer, allowing it to become pale and fluffy.
Equipment Checklist
- Stand mixer or hand mixer (cuts creaming time to 2 to 3 minutes and incorporates more air than mixing by hand, which directly improves biscuit lift)
- Light-coloured aluminium baking sheet (conducts heat evenly and prevents over-browning on the base, which is the most common reason home bakers get crispy bottoms when they wanted chewy biscuits)
- Parchment paper or silicone baking mat (prevents sticking without greasing, which would add excess fat and cause the biscuits to spread too thin)
- Two mixing bowls
- Spatula and wire cooling rack
If you're choosing baking trays or want guidance on heat-conducting cookware, our guide to best cookware for induction cooktops covers material types and heat distribution in detail. And if you're preparing any fresh fruit or need to prep other ingredients with precision, our how to sharpen a kitchen knife guide will keep your tools in good shape. RecipeTin Eats also offers helpful notes on ingredient selection if you want to compare approaches before you start.
How to Make Oat and Raisin Biscuits: Step-by-Step Instructions
Oat and raisin biscuits are made by creaming butter and brown sugar, adding egg and vanilla, folding in dry ingredients and oats, chilling the dough for 30 minutes, and then baking at 180°C for 10 to 12 minutes. Here's exactly how to do it.
Step 1: Soak the raisins
Put 150g of raisins in a bowl and cover them with warm water or orange juice. Leave them for 10 minutes, then drain and pat dry with kitchen paper. This single step prevents the raisins from pulling moisture out of the dough during baking and keeps them plump and soft inside the finished biscuit.
Step 2: Preheat the oven
Set your oven to 180°C (350°F) if it's fan-assisted, or 190°C (375°F) for a conventional oven. Fan-assisted circulation distributes heat more evenly and reduces hot spots that cause uneven browning. If you're unsure which oven type you have or how they differ for baking, our microwave vs convection oven baking guide explains the differences clearly.
Step 3: Cream the butter and sugar
In a large bowl or stand mixer, beat 115g of room-temperature unsalted butter with 150g of light brown sugar on medium speed for 2 to 3 minutes. You're looking for a mixture that's pale, fluffy, and noticeably increased in volume. Don't rush this stage. The air you incorporate here is what gives the biscuit lift and structure.
Step 4: Add egg and vanilla
Add 1 large egg and 1 tsp of vanilla extract directly to the butter-sugar mixture. Beat for around 30 seconds until fully combined, then scrape down the sides of the bowl with a spatula to make sure everything is incorporated evenly. Sally's Baking Addiction recommends this scrape-down step to avoid pockets of unmixed butter at the edges.
Step 5: Mix the dry ingredients
In a separate bowl, whisk together 100g plain flour, ½ tsp bicarbonate of soda, 1 tsp ground cinnamon, and ¼ tsp salt. Fold this dry mixture into the wet ingredients using a spatula, stirring only until just combined. Overmixing at this point develops the gluten network and produces a tough biscuit rather than a tender one. Jane's Patisserie's oatmeal raisin cookie guide makes the same point about keeping the mixing gentle.
Step 6: Fold in the oats and raisins
Add 200g of rolled oats and the drained raisins to the bowl and fold them in until evenly distributed. The dough will be thick and slightly sticky at this point. That's correct. Don't add extra flour to compensate.
Step 7: Chill the dough
Cover the bowl and put the dough in the refrigerator for 30 minutes. Chilling solidifies the butter, which slows the rate of spreading during baking and produces thicker, chewier biscuits. If you skip this step, the fat melts before the structure sets and the biscuits come out flat. This is one of the most important techniques in the recipe, and Quaker Oats' baking notes and RecipeTin Eats both point to chilling as a key factor in achieving the right shape.
Step 8: Portion the dough
Line a baking sheet with parchment paper. Scoop the dough into balls of approximately 40g each (about 1.5 tablespoons) and place them on the sheet spaced at least 5cm apart. They will spread during baking, and they need room to do so without merging.
Step 9: Bake
Place the baking sheet in the centre of the preheated oven. Bake for 10 to 12 minutes if you want chewy biscuits, or 13 to 15 minutes for a crispier result. The edges should be lightly golden and set when you pull them out, while the centres may still look slightly underdone. That's exactly right. They continue to firm up outside the oven. If your oven runs hot or you're using convection, check for doneness about 2 minutes earlier than the recipe states, since a convection oven bakes approximately 25% faster than a conventional one.
Step 10: Cool on the tray
Leave the biscuits on the baking sheet for 5 minutes before moving them to a wire rack. They're fragile straight out of the oven and will firm up significantly during this rest. Resist the urge to move them early.
If you enjoy baking projects like this, you might also like our cottage cheese pancake recipe or our protein powder mug cake recipe for quick single-serving bakes.
Expert Tips, Variations & Troubleshooting for Perfect Results
When Things Go Wrong
If your biscuits spread too flat, the butter was too warm before creaming or you skipped the chilling step. Both cause the fat to melt before the biscuit's structure sets in the oven. Start again with properly tempered butter (it should hold its shape when pressed but yield without resistance) and chill the dough.
If the biscuits turn out dry and crumbly, you've likely used too much flour. The most reliable way to measure flour is to spoon it into the measuring cup and level it off with a straight edge. Scooping directly from the bag compacts the flour by up to 20%, which throws off the recipe balance. AllRecipes also flags this as one of the most frequent causes of dry cookies.
Pro Techniques
For an extra-chewy texture, replace 1 tablespoon of plain flour with 1 tablespoon of cornflour (cornstarch). This is a technique used in professional pastry kitchens to soften the gluten network without altering the flavour. Jane's Patisserie uses a similar approach and notes it makes a noticeable difference to the finished texture.
When soaking raisins, try rum, apple juice, or brewed black tea instead of plain water. Each liquid adds a layer of flavour that lifts the biscuit from home-baked to café-quality without changing anything else about the recipe.
Variations
Adding 50g of dark chocolate chips, chopped walnuts, or desiccated coconut alongside the raisins creates popular variations. None of these additions alter the base recipe ratios, so you don't need to adjust baking time or temperature.
For a gluten-free batch, swap the plain flour for a 1:1 gluten-free flour blend and use certified gluten-free rolled oats. Baking time and temperature stay exactly the same. Our Gluten Free Christmas Biscuits Guide covers additional gluten-free biscuit options if you want to expand from here.
Storage, Freezing & Reheating
To keep oat and raisin biscuits chewy for up to 5 days, store them in an airtight container at room temperature with a slice of white bread. The bread releases moisture that prevents the biscuits from hardening. Don't refrigerate baked biscuits: cold air dries them out faster than room-temperature storage. For safe dough storage in the fridge before baking, check our guide on refrigerator temperature settings and food safety.
Raw dough balls can be frozen on a baking sheet until solid (about one hour), then transferred to a freezer bag and stored for up to 3 months. Bake directly from frozen at the same temperature, adding 2 to 3 extra minutes to the baking time. No thawing required.
To restore that just-baked feel to biscuits that have been sitting for a few days, place them in an air fryer at 160°C for 2 to 3 minutes. The outside crisps slightly while the centre warms through, and you avoid the sogginess that a microwave produces. RecipeTin Eats recommends a brief warm-up for stored cookies for the same reason. Sally's Baking Addiction and AllRecipes both suggest airtight storage as the best default.
Looking for more recipe inspiration? Our crustless chicken pot pie recipe is another straightforward, satisfying kitchen project worth trying.
Oat and Raisin Biscuits: Frequently Asked Questions
Q: What is the difference between oat and raisin biscuits and oatmeal raisin cookies?
They are the same baked product. Oat and raisin biscuits and oatmeal raisin cookies refer to exactly the same thing. "Biscuit" is the British English term, while "cookie" is the American English term for the same individually portioned, sweetened baked good made with rolled oats and raisins. This recipe works regardless of which term brought you here. Sally's Baking Addiction and RecipeTin Eats use the American "cookie" terminology, but the techniques and ingredients are identical to what's in this guide.
Q: Do I have to chill the dough before baking?
Yes, and it's not optional if you want thick biscuits. Without chilling, the butter melts too quickly in the oven and the biscuits spread into thin, flat rounds. Refrigerating for at least 30 minutes solidifies the fat and gives the biscuit time to set before it spreads. If you're short on time, 15 minutes in the freezer achieves a similar effect.
Q: Can I use quick oats instead of rolled oats?
You can use quick oats in a pinch, but the result will be noticeably different. Because quick oats are pre-steamed and cut into smaller pieces, they absorb moisture faster and produce a softer, more uniform biscuit with less chew and less texture. Rolled oats hold their shape through baking and give you that recognisable hearty bite. Use rolled oats whenever you can. Quaker Oats' recipe guidance consistently recommends old-fashioned (rolled) oats for the same reason.
Q: Why do my oat biscuits turn out flat?
Flat biscuits almost always come down to one of three causes: butter that was too soft or melted before creaming, skipping the dough-chilling step, or too little flour from improper measuring. Make sure your butter is at room temperature but still holds its shape, always chill the dough for 30 minutes, and spoon flour into the measuring cup rather than scooping it directly from the bag.
Q: How should I store oat and raisin biscuits to keep them chewy?
Keep baked biscuits in an airtight container at room temperature for up to 5 days. Place a slice of white bread inside the container: the bread releases moisture that prevents the biscuits from hardening over time. Don't refrigerate them, as the cold environment dries them out more quickly than room-temperature storage does.
Q: Can I freeze oat and raisin biscuit dough?
Yes. Scoop the dough into individual balls and freeze them on a lined baking sheet until solid (about 1 hour), then transfer to a zip-lock freezer bag. Frozen dough keeps for up to 3 months. Bake directly from frozen at the same temperature with no thawing needed, adding 2 to 3 extra minutes to the baking time.
Q: Can I make this recipe gluten-free?
Yes. Swap the plain flour for a 1:1 gluten-free flour blend and use certified gluten-free rolled oats (standard oats are frequently cross-contaminated with wheat during processing). All other ingredients and the baking instructions remain unchanged. For more gluten-free biscuit ideas and techniques, see our Gluten Free Christmas Biscuits Guide.